Tuesday, November 17, 2015

Bible Quiet Book: the Nativity

Okay, these pages I did not design. Some other great gal already did the work of designing this template before me. You can get these great free templates here.

I modified her project for a quiet book (her original application was a cute Advent calendar). I created backgrounds of sky and land and I modified the stable to make it a bit more substantial. Here are the finished pages, just to inspire you!

Here is the two page spread.


These two pages probably took the most time of any of my pages (approximately 3 weeks to complete). There are a lot of little pieces and I hand sewed all of them. However, they were worth the extra work as they turned out quite detailed and beautiful.

I hope you give these pages a try. They are a significant contribution to the Bible quiet book.


Sunday, October 18, 2015

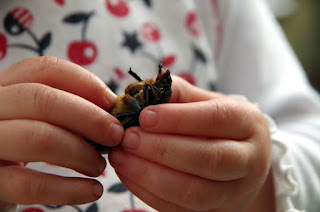
Photography Challenge Week 35

Hands


If you are wondering what happened to Week 34, the topic was newborns, and neither my husband nor I could think of anything to take a picture of since we don't have anything newborn around us right now. 


Monday, September 21, 2015

Bible Quiet Book: Joseph

Here is my next template for you to try. This page is Joseph and several changes of outfits. I saw a lot of ideas for Joseph and his coat of many colors on the internet. But I decided to take this page one step further.


Joseph has four outfits: one for each season of his life.
1. He has his coat of many colors for when he is at home with his father and brothers.
2. He has a simple outfit for when he is Potiphar's slave.
3. He has a poor outfit with chains on his wrists for when he is in prison.
4. He has a elegant outfit for when he is second in command in Egypt.


My original template for Joseph came from this coloring page.

This page was fairly simple to make. Here's my template.
Joseph Template

(Disclaimer: I'm not an artist. These templates are imperfect, but usable. You might want to make slight adjustments to make them a bit more perfect.)


Saturday, August 22, 2015

Bible Quiet Book: Jonah and the Whale

As promised, here is the first post in a series showing my pages in detail plus the templates I used to create them. Let me just say that the Jonah and whale pages are some of my kids' favorites. They ask to play with these pages more than any others. 

Let's start by looking at how my finished pages turned out. This is the two page spread.

This is the whale. I found some cute sea creature buttons that I sewed on for added details.

Here is the beach side, where Jonah can be spit up onto the dry land.

Jonah can fit inside the whale's mouth.

Jonah, 3 felt fish, and 3 coconuts can all snap off for fun play.

So here are the templates to make these pages! I just included the top of the waves for the background, as my full page would not fit on a 8.5" x 11" page. You can make the background water as long as needed to fit your page size. Click on the names to access the PDFs for download.

I did not create the beach template. I modified the Chicka Chicka Boom Boom template from this website.
And here is the coloring page I used as inspiration for creating my template. 

I hope some of you will try making this scene. It was a lot of fun!

Photography Challenge Week 27

Reading


Sunday, August 16, 2015

Update 4 on Bible Quiet Book


I guess you know what this picture means. My Bible quiet book is done! Hip, hip, hoorah!

We tested it for the first time today in church, and the kids loved it. I realized I'd better take pictures quick before it gets "loved on" too much.

Stay tuned for details...

Mini Pizzas

Suppers are light in our household (we have the big meal at lunch). So I'm always on the lookout for easy recipes to have at night... beyond just sandwiches. These mini pizzas are great: fast, easy, delicious, and a big hit with the kids.


My family loves pizza, and we usually make the crust and the sauce from scratch. But it's a big, time-consuming project. So when I need something fast, I turn to this recipe.

The crust is made from tortillas. They actually make a pretty decent thin crust pizza and if you have store-bought tortillas on hand, nothing could be simpler.


Kid approved! They love the little mini slices you can make from these pizzas. ;)

Mini Pizzas
Flour tortillas
Shredded mozzarella
Pizza sauce
Other toppings such as pepperoni, ham, onions, peppers... you name it!

Pretty easy; just make them like you would a normal pizza. I just suggest you not go heavy on the sauce. Bake them on a baking sheet at 350 degrees for about 15 minutes. 


Photography Challenge Week 26

Hats

Photography Challenge Week 26: Hats

Thursday, July 23, 2015

Update 3 on Bible Quiet Book

Eeeeeeek!

Okay, sorry... just had to get that out.

I'm so excited to say that just finished my last page. All my pages turned out really well, and I'm so excited to get to share them with you soon.

All I have left to do is to bind the book somehow and make the cover. I'll be taking a trip downtown soon to get the final supplies I'll be needing.

A look back at my blog shows me I started planning this project in February and now it is almost finished, 5 months later. Can't wait to get it bound so we can take it to church for our "maiden voyage," although the kids have been playing with individual pages for quite awhile now.

So, hang in there a little longer. Once I complete the book, I will be blogging like crazy, giving detailed instructions, templates, and pictures to show you how you can do what I did!

Friday, June 5, 2015

Update 2 on Bible Quiet Book

I know it's been awhile since I posted anything here about my Bible quiet book, but I wanted you to know I have been working on it quite diligently (at least until recently).

This picture is proof that I have gotten something done!


I had a chance to showcase my work at a homeschool "show and tell" at our church. No, I'm not technically homeschooling yet, but I will be next year. :)

I've completed 8 pages so far. I need to do 6 more and make the cover. Progress is being made! Although I've taken a brief break from my concentrated work to complete some other tasks, I expect to resume my work soon. Stay tuned for more!

Homemade Yogurt

I am very pleased and grateful to say that my very first attempt at making yogurt turned out successful. I've been wanting to try it for a long time but was a bit intimidated by the necessity to keep it warm for a long time. I don't have a yogurt maker here and I was afraid that the process was going to be much too involved to be practical for me to accomplish.

That's when I ran across this recipe, which not only takes only about 3 hours to make, but uses a crockpot to maintain the warmth. Genius! I thought. And it was.


I also read this recipe, which I found had some useful additional hints. The only things I really altered from the first recipe are that I added a tiny bit of sugar to help in the fermenting process and I doubled the yogurt starter. Next time, I will try it without the additional sugar and see how things go. I'd like to have a non-sweet yogurt, as it is definitely more versatile.

We tried it this morning and it was very good. I blended it with some fresh strawberries. Interestingly enough, the yogurt was thicker out of the jar but when I blended it, it turned quite liquid and worked well as drinkable yogurt. Not a problem, since we are used to drinking our yogurt here.

All in all, I was happy with my first attempt and I look forward to experimenting with this further in the future.


Friday, April 24, 2015

Philly Cheesesteak Sandwiches

So it's about time I posted a recipe.

I've been thinking about this blog often as I cook, but I've been spending most of my spare moments working on my quiet book, so my blog has taken a back seat for the time being.

Still, I promised to post things that were yummy, so here's one for starters! (I apologize ahead of time for the crummy cellphone pictures. My husband took the kids outside while I was cooking this meal--which I appreciate--but he unfortunately took the camera with him as well.)

As a little background, I buy beef ("estofado" or stew meat) that is pretty tough and needs to be either pressure cooked or slow cooked in order to make it enjoyable to eat. However, I wasn't completely satisfied with any of the cheesesteak recipes I was finding for these types of cooking methods. The vegetables kept coming out as mush, which I didn't find overly appetizing. I also felt like the recipes were always low on the vegetable side. So, I've combined a few recipes into one and adapted it to fit my particular likes. If you find you are having the same problem as me, give this recipe a try!


Cooking my yummy vegetables!


Pretty easy to do while the meat is pressure cooking away. Did I mention how much I love my pressure cooker?


What the meat looks like when it's done. I used too much water, so I reduced the water amount in the recipe I'm sharing with you.


The final product! Yummy goodness....Mmmm.


Philly Cheesesteak Sandwiches

2 lb beef (round steak or whatever other cut you prefer), cut into bit sized strips
3 bell peppers, cut into strips
3 large onions, sliced 
1 pkg onion soup seasoning mix
1/2 cup water
2 Tbsp Worcestershire sauce
1 tsp garlic powder or 2 garlic cloves, minced
6-8 six-inch hoagie style buns 
6-8 slices Provolone or Mozzarella cheese
1-2 Tbsp butter or olive oil

Directions

Place strips of beef into pressure cooker. Add onion soup seasoning mix, water, and Worcestershire sauce. Pressure cook for 25 minutes. (This is the right amount of time for the toughness of my beef and my altitude. I suggest starting out with 10 minutes and testing doneness. You can always cook it for longer if needed.) 

Meanwhile, saute peppers, garlic, and onions in oil or butter in a skillet. Cook until tender but not overcooked. When the meat is done, add vegetables to meat mixture and simmer gently on the stove for an additional 5 minutes. Serve over buns and top with cheese. 

If desired, you can toast the sandwiches in the oven before serving.

Printfriendly